Showing posts with label Recipes: Soil to Snack. Show all posts

Saturday, November 9, 2013

Roasted Fall Veggies


digging for potatoes

Fall is a wonderful time to roast vegetables! And the garden is a perfect place to find delicious vegetables to roast and eat. Kids from Lincoln and Northgate Elementary Schools were able to harvest some pumpkins and squash, leeks, carrots, beets, and potatoes and make a tasty snack.  Here is the recipe!

Fall Roasted Vegetables

-  Peel the potatoes, carrots, and beets and cut them into pieces that are about as wide as a finger and about 1 ½ inches long. 
-  Scoop the seeds out of the squash and small pumpkins, and cut them into pieces about ½ by two inches long.  You can take the peel off or leave it on if the skin is thin. 
-  Cut the root and dark green leaves from the leek and cut it the long way.  Use scissors to cut the leek into 1-inch pieces.
-  Toss all of the vegetables with olive oil and place them single layer on a baking tray.  Bake them at 375 degrees for about 30 to 40 minutes.  You should watch them closely and have an adult help you check if they are done by poking a fork in them.  They’re ready to eat when they’re soft and lightly brown.  Delicious!

What else could you roast in the oven?  What about zucchini, broccoli, cauliflower, or yams?  The answer is yes!  Very hard vegetables (like yams) may take longer to cook, so you can chop the pieces smaller, or put them on their own baking sheet so they can stay in the oven a little longer.  This is a wonderful time to experiment in the kitchen and find out which veggies you love the most.  Enjoy!

Celebrating fresh food and fun cooking!

Monday, October 28, 2013

Yummy Potato Leek Latkes

Every week the IslandWood garden is filled with students from visiting schools. And one of our favorite programs to teach is an experience called Soil to Snack. What is Soil to Snack you may wonder? The answer lies in the name... The students harvest fresh food grown right here in the garden soil, and then work with IslandWood chefs to learn how to cook a yummy snack!  Our students learn first-hand how delicious fresh food tastes, AND they learn how to cook healthy food when they return home. 


tasting yummy garden treats like broccoli flowers
The students start in the garden tasting different foods and harvesting ingredients for their cooking project.

harvesting potatoes...
...and leeks (or is it a garden octopus hat??)
Once they have harvested the ingredients, they head over to the kitchen to work with our IslandWood chefs and create a delicious (and nutritious!) garden snack.  Potato Leek Latkes have been a Fall favorite.  Here is the recipe so you can create this delicious snack at home!

Potato Leek Latkes

9 Potatoes (medium-sized)
3 Leeks
4 Eggs
½ c. Flour
2 ½ tsp. Salt
1 ½ tsp. Black pepper
½ c. Canola oil (or any frying oil)

1.   Peel the potatoes and grate them into a bowl lined with cheese cloth. Bring the ends of the cheese cloth together and twist to squeeze out as much liquid from the potatoes as possible. Then transfer the grated potatoes into a large mixing bowl.  (You can also press the liquid out through a colander if you don’t have cheese cloth). 
2.  Trim the root and leafs from the leeks and discard. Cut leeks once length-wise, then use scissors to snip leeks into fine shreds. Add to potatoes. 
3.   Crack the eggs into a bowl and whisk until smooth. Add the whisked eggs to the potatoes and leeks and stir gently. 
4.  Add the flour, salt, and black pepper. 
5.  Stir all ingredients until well mixed and presto, delicious Latke Mix! 

With the help of an adult, heat the oil in a large heavy-bottomed skillet at a medium-high temperature until hot. Place large spoonfuls of Latke mix into the hot oil and press down on the top to form ¼ - ½ inch patties. Fry until the edges are golden brown, then flip and repeat (usually about 2 ½ - 3 minutes per side). Carefully remove the Latkes and place on a wire rack or paper towel to drain any excess oil. 

Serve warm and Enjoy!


Potato leek latke with herb sour cream, baked cinnamon apple sauce and kale chips.  With fresh garden tea to drink.  All ingredients found in the garden and prepared in the kitchen!

Tuesday, May 21, 2013

Heavenly Rhubarb Lemonade


Rhubarb lemonade was a huge hit with Team Rain from Salmon Bay Elementary!

Team Rain loved the rhubarb lemonade so much they nicknamed it "Rhub-ade". One team member remarked, "It wasn't rubade, it was heaven".  We agree!!

Rhubarb is a perennial vegetable that can be harvested in the spring and into the summer.
Just eat the stems, which are delicious in pies, cobblers and even lemonade! DON'T eat the leaves because they are poisonous. 

Rhubarb Lemonade
Combine in a saucepan:
2 to 4 cups chopped rhubarb stems (more rhubarb will make it more tart and colorful)
1 1/2 cups sugar
1 1/2 Tablespoons grated lemon zest
1 cup water
Bring ingredients to a boil and let it simmer over medium-low heat for about ten minutes until the rhubarb is soft. 
Set it aside and let it cool.

Meanwhile, cut 6 to 8 lemons in half and juice them with a reamer.  You should try to get about 3/4 cup lemon juice.

Fill a pitcher with about 8 cups of water and ice.  Pour the rhubarb mixture into a sieve and use a wooden spoon to press out as much of the rhubarb liquid as possible into the water.  You'll be left with the lemon peel and some rhubarb goo in the sieve, which you can eat (the kids thought it was delicious) or compost.

Pour the lemon juice into the sieve above the pitcher to remove the seeds and press gently to get the juice from the pulp.  Stir well and give it a taste.  Does it need more juice?  More water?  More sugar (I doubt it!)?

Serve with a fresh mint leaf if you wish - Mmmmm!

Wednesday, May 8, 2013

Soil to Snack: Corn Biscuits

Warm May sunshine welcomed Team Forest, from Silver Ridge Elementary, into the IslandWood garden. Our Soil to Snack project was to make Corn Biscuits.  But not just any corn biscuits.  No, these were going to be truly Farm to Table, Slow Food biscuits.

What does Farm to Table and Slow Food mean?  For starters it means delicious, wholesome food, and I think Team Forest would agree as they devoured the biscuits!

We started with fresh local corn from Emily's farmer friends Aaron and Dana.  They farm Around the Table Farm in Poulsbo, WA using organic farming methods, companion planting and crop rotation.
Aaron

Dana

Not only was this corn grown with much love and care, but the soil it was planted in was tilled by two giant horses that belong to another local farmer, Betsy, from Laughing Crow Farm.  

Animal powered Farming!  Draft horses and sisters Abby and Red of Laughing Crow Farm

Beautifully colored corn, about to become corn flour!

Making the biscuits was a fun but slow process.  First the students took the corn kernels off the corn.

Olivia helping one of the students turn the mill wheel.
Next we used a grain mill to grind the corn into flour
The corn flour still has some of the beautiful colors
Jen helping the kids make the biscuit dough

We took the corn flour over to the cob oven in the garden, and started making biscuits.  The recipe calls for buttermilk, so instead of buying buttermilk, the kids made buttermilk!  All you need to make buttermilk is a carton of cream and lots of people willing to shake it.We put the buttermilk into a glass jar and took turns shaking it while we walked around the garden, and in no time we had both fresh butter and buttermilk.
The buttermilk was incorporated into the corn flour batter and the butter we saved for later...
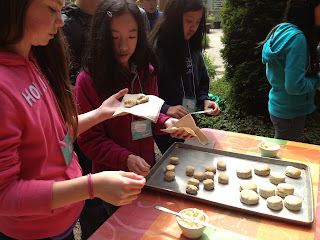
The kids rolled out the biscuit dough--some in funny shapes!
And we put the trays into the cob oven and baked them using heat from a wood fire.

Nice hot coals to bake delicious biscuits

When the biscuits were golden colored and ready to eat, we took the butter we had saved from the buttermilk process and added some honey to it to make delicious honey-butter...Yum!


Fresh, local ingredients, grown and harvested with care, became the tastiest biscuits.  It was truly a delicious, Slow Food, Farm to Table day in the garden.

Here is the recipe:

Cornmeal Buttermilk Biscuits (makes 8 biscuits)
1 1/3 Cup flour
2/3 Cup polenta style cornmeal
2 1/2 tsp baking powder
1/4 tsp baking soda
1 tsp sugar
1 tsp salt
6 Tbsp unsalted butter diced
3/4 Cup buttermilk

Preheat oven to 450 degrees F and line a baking sheet with parchment paper.  In a large bowl whisk flour, cornmeal, baking power, baking soda, sugar and salt.

Rub 2 Tablespoons butter into flour mixture with fingertips until incorporated.  Work remaining butter in until pea size.  Gently stir in buttermilk.

Roll dough out to 1/2 inch thickness, cut into desired shapes and bake for about 15 minutes.

Enjoy!!

Wednesday, March 6, 2013

March 6, 2013

Soil to Snack: Welcome St. Catherine and Orca K-8!
Fresh Harvest Nettles

Chocolate Stinging Nettle Crepes
 Tis' the season of newly emerging stinging nettles, perfect for soups, pesto and anything else....including crepes! Nettles can be found throughout our Pacific Northwest forests and are super abundant. Harvest only the upper leaves about 4-6 inches down the plant, and be sure to wear good gloves. So fun~

Ingredients
1/4 cup cocoa
1/2 cup flour, or 3/4 cup if you don't want to use cocoa
1 cup milk
2 eggs
1 tablespoon sugar
1 teaspoon salt
2 tablespoon melted butter
Chopped nettles on the top


Mix/whisk all your wet and dry ingredients together until smooth, without bumps and not too thick. If the consistency is thick like regular pancake batter, add some water to thin it out. Cook individual crepes in a frying pan, then add your chopped nettles to the top, as many as you like....Enjoy!

Wednesday, February 27, 2013

February 27th, 2013

Soil to Snack~ Welcome East Port Orchard and Allen Creek!


 Potato Gnocchi!

Gnocchi is a delicious potato pasta dumpling, or also known as a "potato pillow of love". To add some color to your gnocchi, you can use purple, blue (yes, there are purple and blue potatoes!) or red potatoes...so cool!


Ingredients
2 Cups potatoes (boiled or roasted)  
2 Cups flour 
1 teaspoon both salt and pepper
1 egg


Mix the ingredients above into a ball of dough, dusting with flour so as not to stick to the table. Take a piece of the dough and roll it into a finger-width log. Cut into 1/2 inch pieces. Dip a fork in flour and roll the fork over each piece of gnocchi, gently making an impression. Make gnocchi out of all the dough.

Drop the gnocchi into boiling water (with oil) in small batches. As they arrive at the top of the water, scoop them out using a slotted spoon. Allow to cool on an oiled pan. 

Saute some veggies in olive oil and add in the gnocchi to warm them up. Or serve with your favorite tomato or pesto sauce. Yum!! 


Thursday, February 14, 2013

Parsnip and Heart-Shaped Beet Biscuits!

February 14, 2013


Happy Valentine's Day!


In honor of the day, Chris brought out his heart cookie cutter and we created some heart shaped beet biscuits! We also made parsnip biscuits to utilize some of our seasonal root veggies in the garden. See the recipes listed in Recipes: Soil to Snack under beet or kale biscuits, and just substitute in parsnip puree....

Parsnip Puree

Ingredients
2 medium fresh parsnips, peeled and chopped into 1/2 inch thick slices
Water, enough to cover

Boil fresh parsnips in the water, enough just to cover them in the pot. Bring water to a boil, and continue boiling until the parsnips are tender. Drain, and puree in a blender, food processor, or by hand with a potato masher! You can add a little butter if you would like them more creamy. Add them into the recipe as called for...Voila!

Tuesday, February 5, 2013

Tempura Veggies!


Tempura is a Japanese dish of seafood or vegetables that are battered, and deep fried. Traditionally, people mix the ingredients with chopsticks to help create a light, and fluffy texture. These are simple, delicious, and who doesn't love a little fried snack? Choose your favorite fresh vegetable(s) and enjoy!

Ingredients

1 cup flour (can use all purpose, or fine cake flour for a lighter texture)
2 egg yolks
1 tsp baking soda
~ 1 cup of icewater or until desired consistency (very important that it is ice cold)
Canola oil, or other cooking oil for frying 
Salt to taste, or any other seasonings you like

You can also make dipping sauces for your tempura. Look at a cookbook, find a recipe online, or get creative and make your own!

~Mix the flour, egg yolks, and baking soda together, then add in the icewater until the consistency is a bit liquidy and easy to pour, or dip veggies into. 

~Heat up your oil in a deep sauce pan, or dutch oven to about 375 degrees (you can test this by dripping some batter in, and seeing if it begins to fry). Keep a very close eye on your oil! You don't want it to get too hot, so be sure there is an adult present when making tempura.

~Lay out your veggies on a large pan and pour batter over them, or dip them in the batter with some tongs. Let them drain a little, then put them in your oil. Fry them until golden, and place them on a towel for a couple minutes to remove excess oil.

~Eat, and enjoy!

Wednesday, January 30, 2013

Kale Biscuits


With leeks on top!
Kale Biscuits!

See the recipe below for beet biscuits and substitute in kale for the beets. The kale puree is prepared by first removing the spines of the kale leaves and boiling the greens in some water (just enough to cover the kale), then pureeing in a blender or food processor to a smooth and creamy consistently. You probably need about 8-12 kale leaves or a good handful, depending on their size. Enjoy!

Beet Biscuits!
These biscuits add some color, variety, and personality to your biscuits!

Start by pre-heating the oven to 400 degrees, and line a baking sheet with parchment paper ( a special paper used in baking to replace greasing). If you don't have parchment paper, just grease your pan with butter or a non-dairy alternative.

Ingredients

3 1/2 cups of all purpose flour
1 tsp salt
1 1/2 tsp baking powder
3/4 tsp baking soda
1 1/2 tsp sugar
4 oz cold butter
1 1/2 cup total liquid, buttermilk and beet puree together. Roughly around 3/4 C of puree, and 3/4 C of buttermilk. 
Red beets, about 1 medium/large size
~2 cups Apple juice, or enough to cover beets

~First, make your beet puree. Cook the beets in some apple juice until soft, peel the skin off, and puree in a blender or food processor. Set aside for later.

~Next, start on your dough. You can shake up your butter first in a jar or can to break it up into smaller pieces. Then, add all of your dry ingredients and the butter in your mixing bowl, and mix until the dough is the consistency of cornmeal (a little coarse and lumpy). Don't over mix your biscuits! The dough should not be smooth, or creamy.

~Add the buttermilk and mix until just it is just incorporated into the mixture. Then pour in your puree into the dough until you reach desired color, or consistency (about 3/4 cup). If you add less puree, be sure to substitute with more buttermilk. Overall, you need about 1 1/3 cup of total liquid.

~ Roll out your dough on a floured surface, to about 1 inch thickness, cut into rounds and place on baking sheet.

~Bake at 400 degrees until the peaks of the dough turn golden brown.

 Making your own buttermilk: 

Who knew you can do this? And it is so easy! Just place 4oz of whipping cream in a jar, and shake vigorously until it has a creamy, thick consistency. This is butter! There is a liquid around this butter which is the buttermilk. Voila!


West Seattle and Catharine Blaine!

 January 30th, 2013!


Sunchoke, out of the ground!!
Sunchokes, in the ground
We welcomed West Seattle and Catharine Blaine Elementary Schools this week to IslandWood, and had some of their fantastic students join us for STS. We made kale biscuits with leek on top, kale chips, fresh raw snacks, and ginger/lemongrass/lemon balm tea...YUM.  First, we harvested our ingredients from the garden which included:


Parsnips


  • Leeks
  • Lacinato or Dinosaur Kale
  • Sunchokes (for tasting)
  • Parsnips (for tasting)
  • Turnips (for tasting)
  • Celery (for tasting)
  • Carrot (for tasting)
  • Lemongrass (tea)
  • Rosemary and Parsley (herbs)


Shake it up!
 In the kitchen, we prepped all the ingredients to make our biscuits, and kale chips (see our STS recipe link!). Students helped us out in many ways. For one, we needed to shake the whipping cream vigorously in a jar to make our buttermilk, and butter for our biscuits. 

Kale Biscuit Time


OMG, Giant Parsnip!


 Time to set up plates and enjoy the fruits of our 
labor! Thank you Chef Chris, Gardener Jen, West Seattle and Catharine Blaine Elementary Students.